← Back to home

How to use PickleMeet.

Easy steps, plain words, a picture where it helps. Pick your part and follow along — you’ll be set up in minutes.

For organizers

Run your open play, step by step

You set it up once. After that, PickleMeet calls the players, runs the queue, and keeps the score. Follow these seven steps.

  1. 1

    Make your account and club

    First you make an organizer account, then you add your club so your name and logo show on the board.

    1. Go to picklemeet.net and tap Club owner? Create an organizer account.
    2. Type your club name, your location, your full name (a nickname is optional), your email and a password.
    3. Tap Create my free account, then enter the 6-digit code we email you.
    4. Add a profile picture. Any picture you like works; it doesn’t have to be your face.
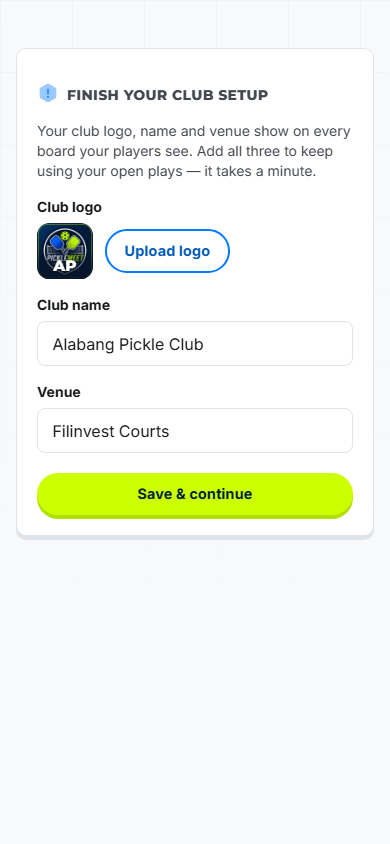
    5. Finish your club setup: add your club logo, club name and venue (search for it), then tap Save & continue. You can add a cover photo later on your club page.

    Tip: you can add co-organizers later so a friend can help you run the night.

    Organizer account and club setup
  2. 2

    Create a session

    A session is one open-play night. You choose your courts and how the games work.

    1. On your home page, tap New Open Play.
    2. Give it a session name, then pick the venue, date, start and end time.
    3. Set Courts, Player cap and your Fee per player (leave it at 0 if entry is free).
    4. Pick a Rotation mode: Open Mixed Rotation, Skill-Level Stacking, Winners/ Losers Pools, Mixed Doubles Priority — Open, or DUPR-Rated Sessions. Not sure? Choose Open Mixed Rotation.
    5. Choose how players join: Check-in & queue only or Advance booking + queue.
    6. Tap Create session.
    OCRTCreate session
  3. 3

    Share the code

    Every session has a QR code and a 5-letter code. This is how players get in.

    1. Open your session from My Open Plays.
    2. On the Dashboard, show the Scan to join QR code on a phone or screen at the door.
    3. Players point their phone camera at it — nothing to download.
    4. If a camera won’t scan, read out the 5-letter Session code under the QR. Players type it into their check-in screen.
    5. On a computer, the Check in QR card is also pinned at the bottom of the sidebar. The TV board shows a Scan to join PickleMeet QR so new players can sign up.
    OSHRShare QR & code
  4. 4

    Let players in

    As people join, they show up in your Player List. You decide who’s in.

    1. Open the Player List & Check-in tab (Players on a phone).
    2. When players check in, the Approve advance check-ins window pops up. Tap Approve for each player, or Approve all.
    3. Each player only needs your OK once per session.
    4. Closed the window? Tap Check in requests to open it again and approve everyone in one go.

    Tip: only you can see who has paid — players never see each other’s payment.

    OAPPApprove check-ins
  5. 5

    Start play — it runs itself

    Now the app does the hard part. You just watch it work.

    1. Tap Start Session on the Dashboard.
    2. Go to the Live queue tab (Queue on a phone) and tap Seat next → Court 1 to start the first game.
    3. After that, Auto Lock & Notify (on by default) seats the next fair group every time a court frees. Phones buzz, players tap I’m on my way!, and the board and TV show NOW CALLING.
    4. Tap the Voice announcer switch beside UP NEXT to have each game called out loud.
    5. If someone doesn’t show, tap Replace next to their name. It works in the first 5 minutes of a game; after that the button turns into End Match, which frees the court.
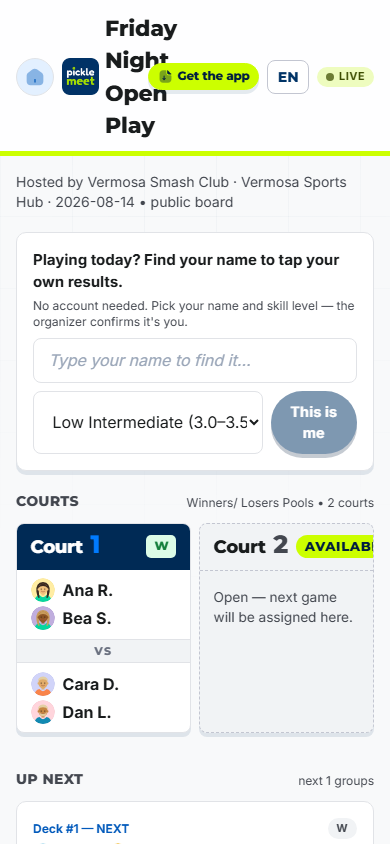
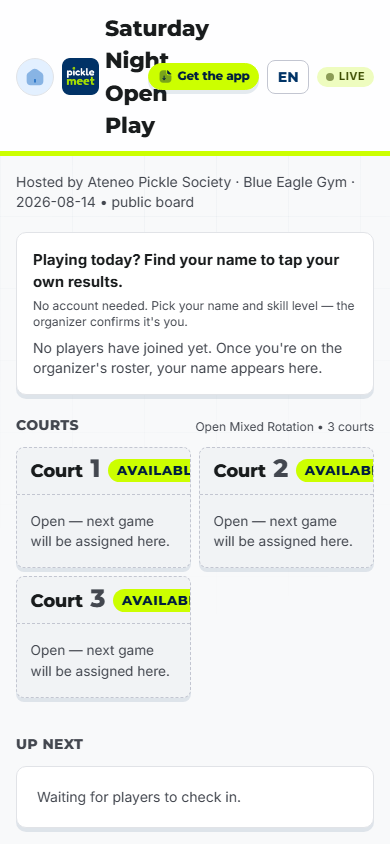
    The live court board with auto-rotation
  6. 6

    Scores record themselves

    The players keep their own score — you don’t have to write anything down.

    1. When the game ends, the four players get a ‘Who won?’ question. One tap and the leaderboard updates.
    2. On DUPR nights, only the winners or you can enter the score.
    3. Made a mistake? Tap Undo within 10 seconds to fix it.
    ORESOne-tap result
  7. 7

    Wrap up the night

    When you’re done, end the session and see how it went.

    1. Tap End session on the Dashboard. Everyone gets a thank-you and the final leaderboard.
    2. On your home page, tap My Finances to see what the night made.
    3. For DUPR nights, tap Export DUPR CSV on the Live queue tab.
    4. The TV shows the end-of-night recap, and a thank-you posts in the session chat about 15 minutes after the end.
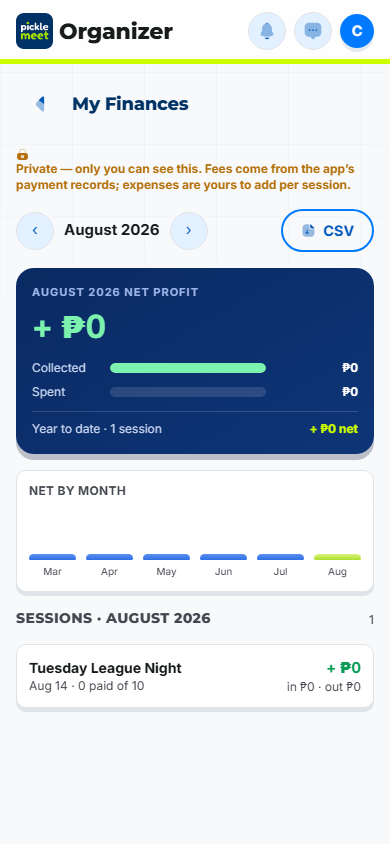
    Wrap up — finances and DUPR export
Session booking

Let players reserve a spot

Want people to book before they come, and pay ahead? Turn on booking. Here’s how to set it up and how to run it.

Set up booking

  1. Start a new session (steps above) and choose Advance booking + queue.
  2. Add session instructions and your GCash, Maya or bank details so players know where to pay.
  3. Set the player cap.
  4. Tap Create session, then tap Share this open play and send the link. Players can now book ahead.
A session with booking, fee and slots
OAPPManage bookings

Manage your bookings

  1. Open the session’s Player List & Check-in tab. New bookings wait under Needs your review.
  2. Tap Review, check the payment screenshot, then tap Approve (or Decline). Approved players arrive already marked paid.
  3. When it’s full, extra players join the Waitlist — the app moves them up when a spot opens.
  4. Remove a no-show and the next person on the waitlist takes their place.
  5. Players tap Join this session, then Proceed to Pay. They pay by GCash, Maya or bank and upload a screenshot within 35 minutes. They can also tap Pay Later — Waitlist me.
  6. Booking for a friend? Once you’re confirmed, tap Book for Someone, enter their name and pay for their slot. To let a friend book for themselves, use Invite a friend.
  7. Players see a small platform usage fee at checkout. A monthly premium is coming soon that waives it. Until then, every feature is free to try.
For players

Show up, scan, play

No clipboard, no waiting to be told your turn. Six easy steps and your game starts working for you.

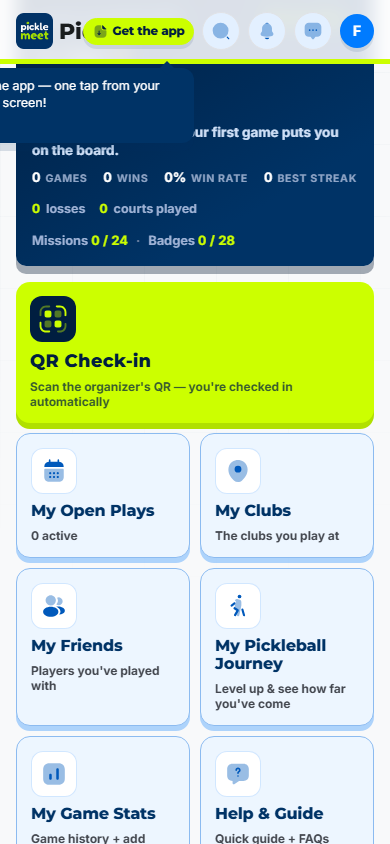
Your PickleMeet player home
1

Make your account

You only do this once. Your account works at every PickleMeet club.

  1. Go to picklemeet.net and tap New here? Create your free account.
  2. Fill in your full name (a nickname is optional), skill level, Male/Female, email and password, then tap Create my free account.
  3. Enter the 6-digit code we email you, then tap Choose a picture to add any photo you like.
PJONJoin a session
2

Join a session

Two easy ways to get in — pick whichever is faster.

  1. Tap QR Check-in on your home page and point it at the session QR (your phone’s camera works too).
  2. No camera? Type the 5-letter code in the box and tap Go.
PCHKCheck in
3

Check in

Tell the app it’s really you, and you’re in line.

  1. That’s it. The app checks you in with one tap, using the name and skill level on your account. (Mixed doubles nights ask “Which side do you play?” first.)
  2. The first time in each session, wait a moment while the organizer approves you. You’ll drop into the session automatically.
  3. On DUPR nights, enter your DUPR ID and rating.
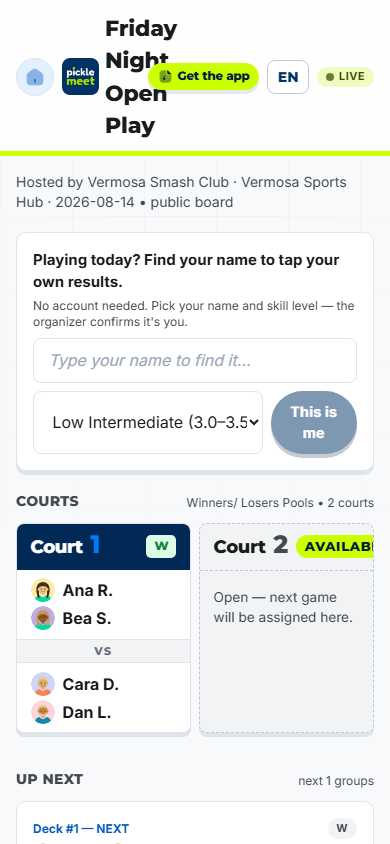
Watch the live board and your place in line
4

Wait for your buzz

You don’t have to hover by the net. Your phone tells you when.

  1. Watch the board to see who’s on and your spot in line.
  2. Your phone buzzes with a court call, and you may hear your name called at the venue.
  3. Tap I’m on my way and walk to the court shown.
ORESTap the winner
5

Tap your score

After the game, record who won — it takes one tap.

  1. Answer the ‘Who won?’ question.
  2. Your wins and streak update on the spot.
Track your Pickleball Journey
6

Grow your game

Every game turns into progress you can see.

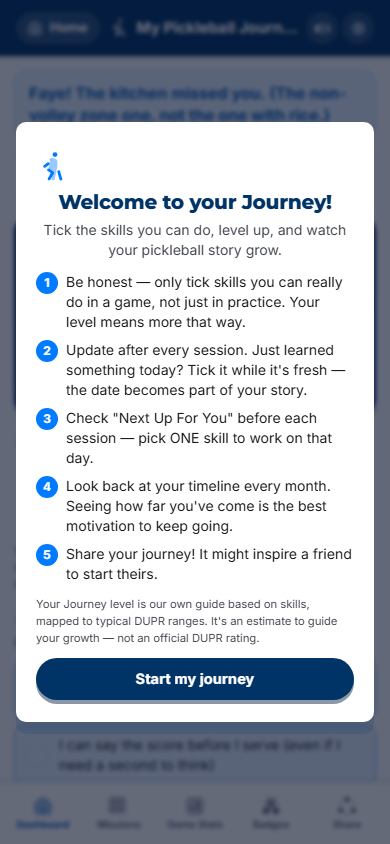
  1. Tap My Pickleball Journey on your home page to see your level, points, 25 missions and 28 badges.
  2. Share Moments on your profile.
  3. Tap My Game Stats to see your game history and how each game moved your win rate.
  4. Played somewhere else? Use Add outside games there.

Your player profile

Your profile is your pickleball story in one card. Tap any player’s photo to see theirs.

Open it

  • Your own: tap your photo at the top, then tap your name.
  • Someone else’s: tap their photo on the board, in the roster or in chat.

What you’ll see

  • The top: photo with an online dot, display name, skill level, “Online now”, your PickleMeet ID, and your ⚡ PickleMeet score. Tap the score to see how to earn more.
  • Three buttons on other players’ profiles: Say Hi, Message, Add Friend.
  • LEVEL AND RATING: your level and % to the next one, plus games, win rate and win streak. Swipe through your Journey badges and missions. It appears after you tick your first Journey skill.
  • Traits you earn by playing, like Regular, Ironman, Streak runner, Social butterfly and Explorer.
  • Your clubs and friends, one tap away.
  • Moments: session photos anyone can see for 30 days.

On your own profile

  • Tap your photo to change it. Tap the ✏️ to edit your name or skill level.
  • Tap MY JOURNEY · LEVEL AND RATING for the full Journey: Dashboard (level, points, your climb, next skills), Missions, Game Stats (stats, places you’ve played, your journey timeline), Badges and Share.
  • Choose what others see: Show my level and stats publicly, plus your play style (preferred side, match type, typical times).
  • The ⋯ menu has Share profile, Copy profile link, Report and Block.
  • Looking for game-by-game history? It lives in My Game Stats.
Everything else

More you can do

Quick how-tos for the rest of the app. Short steps, no fuss.

Chat & friends

  1. Tap the Messages icon at the top to open PickleMeet Chat. Tap + to start a new chat or group.
  2. Type a message or send a photo. Tap an emoji under a photo to react.
  3. Tap the Search icon, choose Players or Clubs, and type a name.
  4. Open a player’s profile and tap Add Friend. It says Requested until they accept.

Book a court

  1. Tap Book a Court on your home page and pick a venue.
  2. Pick a date, then pick your hours on the courts you want.
  3. Confirm, then pay and upload your receipt within 35 minutes. You’ll see a small platform usage fee at checkout.
  4. Once it’s confirmed, open My Bookings and tap Show Check in QR Code.

Clubs

  1. Tap the Search icon, choose Clubs, and find a club.
  2. Open it and tap Join Club.
  3. Tap Yes, home club to make it your home club. It then shows first in My Clubs.
  4. Read club news under Updates and the Pinned announcement.

Court calls & voice announcer

  1. When a court frees, the next four get a court call: a pop-up and a phone buzz.
  2. Players tap I’m on my way; the board and TV show Now Calling.
  3. Organizers: tap the Voice announcer switch beside UP NEXT to turn it on or off.

My Finances organizers

  1. On your home page, tap My Finances.
  2. Use the ‹ › arrows to pick a month.
  3. See money collected, money spent, net by month and each session’s net profit.
  4. Tap CSV to download it for your books.

Run a tournament organizers

  1. Open PickleMeet Tournaments.
  2. Take registrations online.
  3. Run pools and brackets with desk scoring.
  4. Share the public live board.

Our technical team will give you a separate quick training on running the tournament software.

Show it on a TV

  1. Open your session’s Dashboard.
  2. Tap Liveboard TV to open the big-screen board and drag it onto the TV, or tap TV link / QR and open that link in the TV’s own browser.
  3. Leave it on — courts, queue and leaderboard show live, with no login.
  4. It shows NOW CALLING and the end-of-night recap.

Install & turn on alerts

  1. Tap Get the app at the top and follow the steps (on iPhone: Safari → Share → Add to Home Screen).
  2. Open it from your home screen — there’s nothing to download.
  3. When the app asks, tap Enable so your phone buzzes when your court is called.